MakeUseOf.com |

- Cool Websites and Tools [July 24]
- How To Use Tumblr To Easily Create A Rich Media Blog
- How to Make Index Cards in Microsoft Word 2007
- Final Fantasy IV : Free ReMix Music Album
- 5 Online & Software Resources For Booksellers
- 9 Steps To A Great Start In Friendfeed
- Clean up your PC with Windows Installer Clean Up Utility
| Cool Websites and Tools [July 24] Posted: 24 Jul 2009 05:01 PM PDT
(1) Grazr – Free RSS to widget converter that allows you to create cool custom widgets for any RSS, RDF, ATOM or OPML feed. The widgets can be easily embedded on any website or blog. The cool thing about Grazr widget is that apart from simply displaying headlines from chosen feed, it provides an option to read full articles, view photos and play YouTube videos from within the widget. Read more: Grazr: RSS to Widget Converter
(2) RoohIt – Instant web page highlighter which lets you quickly highlight, save and share content from webpages. Just type roohit.com/ before any web URL address and you can start highlighting. No registration required and no download needed. Read more: RoohIt: Instant Online Web Page Highlighter (3) MicrosoftHohmh – New web service by Microsoft which aims to provide you with a detailed analysis of the energy costs related to your home appliances and suggests measures to reduce home energy costs. Read more: MicrosoftHohm: Get Tips To Reduce Home Energy Costs (4) Urban Outfitters Bike Shop – This site lets you to design your own bike and then order it online. You can customize almost any part (frame, grip, chain, tire, Rim… etc.) with the color combination of your own choice, different frame sizes are also available. Read more: Urban Outfitters Bike Shop: Design Your Own Bike Online (5) WebEnabled - Web-based development platform for LAMP (Linux, Apache, MySQl and PHP) developers. It makes it easy to build applications on top of existing content management systems like Drupal, Wordpress, Joomla, Elgg and others, lets you collaborate on your project with others and share your code. Read more: WebEnabled: Web Development Platform for LAMP Developers These are just half of the websites that we discovered in the last couple of days. If you want us to send you daily round-ups of all cool websites we come across, leave your email here. Or follow us via RSS feed. Did you like the post? Please do share your thoughts in the comments section! New on MakeUseOf ? Get cheat sheets and cool PDF guides @ www.makeuseof.com/makeuseof-downloads/ Related posts
| ||
| How To Use Tumblr To Easily Create A Rich Media Blog Posted: 24 Jul 2009 03:01 PM PDT
However, if you want to create a blog which contains rich media, and you don't know (or don’t want to know) much about the technology it sits on, then it's hard to beat the simplicity and capability of Tumblr. The site, and the technology, are free to use. Customisation capability is high, and advertisements are only very seldom shown. If you're an experienced blogger then you might have some trouble with hitting the edges of what's possible, but the casual or new blogger is in great hands here. For those in the know, a quick note. Tumblr uses templates based on CSS. You can customise that extensively. Now go do that while I talk to the new folk, okay?
How to create a new tumblr site (called a tumblog)Firstly, like most other sites, you need an account. Click here, and do that. It's very easy. They want your email address, a password (make it different to your other passwords), and a URL. One note of caution on the last one.
The URL is the address people can find your tumblog on. You can have custom domains with tumblr, but for today let's stick with the basics. You get to choose the part that says differentperspective in the example above. I made some bad choices in the past and now I'm paying for them. Choose something short, snappy and able to be memorised. You'll almost certainly not get your first choice, but keep trying. Once you've signed up, you're ready to rock with the content. Tumblr adds a few dummy posts to your screen so you can see how it's going to look, then suggests you add a photo of yourself. How about we do that?
Click the Photo icon to start.
You can either upload a local image file, or point to one you have stored on the web. Add some sort of a caption, and click the Create post button. We can look at the other options a little later. The tumblr folk are a little impatient, and want to help you customise your blog, so let's do that first, and then we can take a proper look at the post.
Click Customize button. I'll let the American spelling slide this time… A whole host of sample content is displayed on the page so you can see the effect you are having on the posts. Click the Theme link, top left, and select one of them to see what it looks like on the samples.
If the themes are in the way, click the Theme link again and they will disappear.
Tumblr suggests you follow some people next, but I'll leave that one to you. Click the blue X in the top right of the message, and take control back. A couple of points. What you can see now is the Dashboard view, and not what your tumblog actually looks like. Click the actual URL for your tumblog to see what it looks like with the assigned theme.
And that's good, because all the work is done here. Let's quickly add a few more posts, and then I'll tell you about reblogging and tumblarity, I promise. Tumblr directly supports all of the media types you can see listed at the top of the Dashboard. They all work in similar ways.
RebloggingIt's very easy, and very common in tumblogs to steal content. That is, to post to your tumblog something you've seen on another one. It's all quite legitimate, and in the rules for tumblr. Reblogging is easy. Make sure you're logged into tumblr, and then click on a post you like. In the top corner of your page are some buttons.
You can choose to follow the blog, which means that from now on the posts to this blog will show up in your Dashboard. Not in your blog, just your Dashboard, so you can see them. The Dashboard link just takes you back to your own Dashboard from wherever you are. The Reblog button opens the item so that you can post it on your own blog, and it's very similar to the screen you would have if you were posting it in the first place. You can go ahead and repost the item from here, changing the caption/description if you wish. Politeness suggests that you leave the trail of links, so that other folk can find their way back to the source.
In some cases you can also change the type of post. For instance, you can repost an image as a link. Tumblarity
Most of us, however, don't take it too seriously. It's a measure of your popularity in tumblr, and there is no reliable information available on how it works. After a few weeks of monitoring it, I claim that it makes no sense at all, and I'm not alone. Click the Tumblarity link to take a look at the details. Along the top are some stats on your tumblog, and then to the left is your current score.
You can see your rank in the world ( so long as it is better than 50,000).
You can also take a look at your rank for your own country. Sometimes it's good to live in a small country.
I can only reiterate two things. Firstly, it doesn't matter, and you shouldn't take it too seriously. Secondly, please visit my tumblog and save me! I'd love to know how this goes for you, whether or not you have any problems, and how you feel about other platforms for similar functionality. Let me know in the comments. Did you like the post? Please do share your thoughts in the comments section! New on Twitter ? Now you can follow MakeUseOf on Twitter too. Related posts
| ||
| How to Make Index Cards in Microsoft Word 2007 Posted: 24 Jul 2009 01:01 PM PDT
We might not need it for organizing heavy duty scientific information but index cards are one of the best ways to organize information of any sort. Be it kindergarten or the next corporate meeting, the simple ways to use these 3"x5" (or any convenient size) cards, is limited only by creativity. By the way, if you come across the term 'flash cards'…it's just a type of index card. Check out a GTD with Index card photoset on Flickr. Leo Babauta's post on Web Worker Daily is a nice read if you can't come up with your own ways to use index cards. So without further ado let me push on and jot down how we can create index cards (or flash cards) from scratch with Microsoft Word 2007 – minus the cost of paper and print, it is the cheapest way.
Making an index card in Microsoft Word from scratch
Making an index card with Word's inbuilt label standards
Making an index card with downloaded templates
Download Flash Card templates from Microsoft's online gallery. These come optimized for a variety of office supply vendors like Avery. Click on the Office Button – New – scroll down to More Categories under Microsoft Office Online section. Search out Flash Cards. The gallery displays quite a few. You can download and edit them for your personal needs. From learning yourself to teaching others, from cataloguing information to getting things done (GTD), index cards are uncomplicated tools. Its power though starts with the effort to make it. Thankfully, MS Word makes it as simple as tic-tac-toe. Do you buy or do you make? What use do you put them to (I use them as an exercise tracker!)? Does it stand the test of time? Let us know. Image Credit :Serdal Did you like the post? Please do share your thoughts in the comments section! New on MakeUseOf ? Get cheat sheets and cool PDF guides @ www.makeuseof.com/makeuseof-downloads/ Related posts
| ||
| Final Fantasy IV : Free ReMix Music Album Posted: 24 Jul 2009 11:01 AM PDT
You just have to look around a bit, and marvel about the great scores you’ll find. Classical music lovers will feast on Scorpio Fire, and have I mentioned the Tetris song yet? Other games come with a complete soundtrack for you to appreciate. Final Fantasy IV is one of those games. Composed by Nobuo Uematsu, these are amongst the most popular video game music in the world. Whether you’re a fervent Final Fantasy fan yourself, or a proud audiophile, this music can be enjoyed by nearly everyone. The majority of the songs are on the classical side, with a flavour of rock, but other styles get thrown in the mix as well.
Final Fantasy IV : Echoes of Betrayal, Light of RedemptionThere have been numerous reproductions of the Final Fantasy IV soundtrack, but none could’ve been as notable as this one. Thirty-five members of the video gaming music site, Overclocked ReMix, worked on Echoes of Betrayal, Light of Redemption; all of them half musician, half gamer. Together they played the 46 arrangements of the soundtrack, each artist giving his or her personal touch to the score. “[The] album is divided into three acts: Betrayal, Strife, and Redemption. We aspire to recreate the journey from darkness and evil to light and redemption, a recurring theme of the game. (…) The tracks are not arranged in chronological order of release in the game’s original soundtrack, but appear in a new order, to further heighten the drama of the music.” The result is a wonderful soundtrack, with 46 fan-made songs. A complete double-CD, as well as a work of art. SampleBelow is a sample, to whet your appetite and awaken your curiosity. This is the first song of the soundtrack, the opening of the Betrayal act — Full of Courage, arranged by Nutritious. Full of Courage is based on the Nobuo Uematsu original song, The Red Wings. Free DownloadThe complete soundtrack of Final Fantasy 4 : Echoes of Betrayal, Light of Redemption can be downloaded for free. That’s right, you don’t even need to sign up! The easiest method would be to download it via the Torrent file. Due to the participation of the community, the torrent is more than well-seeded, and even though you’re looking at a total of 413 MB (if you prefer mp3) or 1.3 GB (if you’d rather have lossless flac), downloading should go past in a flash. If you don’t know how to use torrents, check out The Big Book of BitTorrent by Saikat Basu, an extensive PDF manual featuring everything you need (actually, really ought) to know. If you don’t like torrents, you can also download the mp3’s straight from your browser. There’s a page on the website here, featuring http links (and mirrors) to all the individual tracks. This is however not recommended. Although you might avoid torrents, you’re looking at the tedious task of downloading each song individually, or having to deploy a site grabber on the mirror directories.
If you used the above torrent link, be sure to pay a visit to the site as well. There’s a lot of interesting stuff on there, including cover art and more information on the subject. Any questions or comments you have can be directed to the comments section below. Don’t be shy, we’d love to hear from you. Did you like the post? Please do share your thoughts in the comments section! New on Twitter ? Now you can follow MakeUseOf on Twitter too. Related posts
| ||
| 5 Online & Software Resources For Booksellers Posted: 24 Jul 2009 10:01 AM PDT
I had to more or less give the whole bookselling thing up eventually as I am totally addicted to books and I become very attached to them. I found it harder and harder to part with gems that I had found at the local fleamarket or online. Nothing is worse than a bookseller who can’t part with his inventory without going into mourning afterwards! The internet has been both a blessing and a curse for booksellers. On the one hand, book businesses are instantly opened up to international markets and it is much easier to find rare books for your inventory on places like eBay. But the flip side of that is that a lot of rare out-of-copyright books are now being freely distributed on places like Project Gutenberg or Google Books. Not to mention the rampant illegal file sharing of book page scans (the Harry Potter books are a good case in point). Another advantage of the internet are the various online and software resources for booksellers. Here’s 5 of them :
AbeBooks HomeBase
HomeBase was actually designed by AbeBooks as a selling and inventory app for their paid subscribers. But it can actually be used by anyone for anything. Whether you’re selling in your own shop or from eBay, HomeBase has you covered – and it’s completely free. Even though it has been around for many years, it is still in development by AbeBooks. They have just brought out 3.0 Beta. As well as allowing you to make a complete digital inventory of all your stock, HomeBase comes with some really useful features. These include :
You can find out more by reading the HomeBase user manual. For a free app, it is really useful. BookFinder
As time goes on and you start selling your stock, you will need to start looking for other books to keep your business going. That’s where you will need a good book finding search engine if you want to start hunting for particular valuable editions. A particular favourite of mine is BookFinder. After entering details of a book, it will then search across LOTS of bookselling websites and bring you a broad overview of the deals currently out there. It will even include the shipping / postage prices to your location. Here’s some of what it brought back for Kipling’s “The Jungle Book” :
Find Your Customers & Contacts Online
A big part of a bookseller’s time is spent on networking. After all, it’s not what you know, it’s who you know, right? So it’s essential to know some good forums and mailing lists that fellow booksellers and potential buyers hang out at. AbeBooks has two great forums – a community forum and a Booksleuth forum (the last one is for people who can’t remember the name of a book so they leave clues and maybe you know the book they mean?). They also have a Bookseller’s forum but you can’t enter that one unless you are a premium AbeBooks member. Another excellent forum is the one operated by Auctionbytes (full disclosure – I used to be a columnist for Auctionbytes). Their book forum is regularly visited by lots of book sellers and I made quite a few good deals with overseas sellers here. Well worth making an account and visiting regularly. A good mailing list is one operated by BookFinder called Insider. When I last used it, it was VERY busy with lots of daily updates by other members, most of them professional booksellers. Make It Easier For Customers To Buy From Your Website
If you insist on building your own checkout system and / or you want to have some good looking payment logos for your site, Smashing Magazine recently brought out a downloadable list of credit card graphics which you can freely use. Get some good book covers
The fastest way to produce a good quality cover picture is to go to Amazon, find the book then click on the link under the book cover to show the enlarged version of the image. Once you have that, either right-click and save the picture. Or use a screenshot app to take a copy of the image. Not all Amazon listings have this option though so there are other options you can try. You can try Googling for the cover, check Google Books, check Fantastic Fiction (one of my favourite websites) or check a site such as the Book Cover Archive. If all else fails, you can just use a scanner to scan the book cover yourself. But scanning can take a lot of time if you regularly go through hundreds or thousands of books. Better to check first if a picture already exists online. What online resources do you use to sell your books? Please tell us all about it in the comments. Image Credit : Dr Jaus Did you like the post? Please do share your thoughts in the comments section! New on Twitter ? Now you can follow MakeUseOf on Twitter too. Related posts
| ||
| 9 Steps To A Great Start In Friendfeed Posted: 24 Jul 2009 09:01 AM PDT
While Friendfeed does have many features and options, when you get to a good start and invest a little time to figure everything out you’ll see it’s not so complicated after all. You might even save some time normally spent on Twitter, Facebook or reading blogs because you can do all of that on Friendfeed and replace some other services you are using – and have some fun and meet interesting people while doing it!
Sign upSign up easily on Friendfeed by entering your details or better yet sign in using your Google, Facebook or Twitter account. When you use Twitter it will import your data such as your avatar, description and username and even look to see which of your friends are already on Friendfeed. If you don’t use any other account to sign up you can choose your first people to subscribe to on the suggested user list.  You can sign up directly or using an existing account. Click “settings” in the upper right corner below your name and set your display name, username, description and avatar. Take some time to pick a nice photograph of yourself or any avatar that suits you because it will be next to anything you post. Next you can tell Friendfeed when to notify you of any new messages or comments by e-mail, IM or the Friendfeed notifier. There are also themes but for now you can only choose one of the pre-made themes that only you will see to prevent the users from having a nauseating Myspace experience. Add your feedsThe most obvious use of Friendfeed is to enter all your feeds to show others and view the feeds of your friends. Even if you only have something like a Twitter and Flickr account this can be useful because it’s an easy way to share your items and receive comments. To add your service go to settings and click add/edit at services. There are currently 58 services available and you can also add any other service that has an RSS-feed such as your blog.  There are 58 services or you can any other RSS-feed Find your friends and new people Import from multiple sources You can import your friends from other places or send them an invite e-mail. You can add a website or RSS-feed that is not on Friendfeed yet by adding them as an imaginary friend. Click “browse/edit friends” and “find friends” to see some suggested people who your friends are subscribed to. You will quickly find some other interesting users by reading your Friendfeed and watching people there who aren’t your friend yet. Tip: strangers have a little white balloon next to them instead of your friend’s light-blue one. There are also people who make their own suggested user lists. I can highly recommend Louis Gray’s monthly lists. Configure pushing items to twitterYou can make some items go to your Twitter followers. It’s very convenient and can replace some services such as Twitpic or Twitterfeed. You do want to set your preferences though because you don’t want to flood your followers. There’s also a check-mark next to any new item you post that lets you choose whether to post to Twitter or not. Install the bookmarkletIf you install the Friendfeed bookmarklet you can open a little pop-up on any website that you visit to share it with your Friendfeed subscribers. Add images from the page by clicking on them, choose a group on Friendfeed to share it with and whether you want to send it to Twitter. This makes sharing with people very easy and replaces some other bookmarklets that share to twitter. It works with most browsers since it’s a bookmark and not a plugin. Sending an e-mail to share@friendfeed.com will also post this to your feed. This is nice for sending pictures from your phone.
Reading your friendfeedNow that you have some friends in your feed, it’s time to familiarize yourself with the layout. First you’ll notice that there are people in there that you haven’t subscribed to yourself. These are FOAF (friend of a friend) items that your friends have liked or commented on. Below an item you can expand the comment and comment or like an item yourself. Liking makes an item show in the feed of your friends.
Put your friends into listsAnother great way of controlling the flow is lists. You can add friends to multiple lists. You start out with “Favorites”, “Personal” and “Professional”. Your standard feed is called “Home feed”. I suggest putting everybody in your home feed and adding some people to your “Favorites” whose updates you don’t want to miss. If you subscribe to more people you can add lists for certain subjects, languages or ‘tryout’ favorites with people that can promote to your “favorites”. Every list has it’s own “Best of day” link at the bottom. Try out the advanced search feature
Advanced search lets you really slice and dice all items on there. Want to find Flickr items with at least 15 likes? Or anything about the iPhone in your favorites list? No problem. Best thing is, you can save searches which then get a button in the sidebar and the results will update in real-time. Join or create a groupIn a group there are people who share an interest. It’s a great way to find some new active people to subscribe to. For instance there is an Apple group, a Friendfeed feedback group or a Movie review group. You can also create a group about a subject that you’re passionate about. I have recently created the Nokia newsgroup. Another way to use groups is to create a private group with some friends or colleagues to collaborate and share and discuss items from the web. The MakeUseOf group is for reading and discussing all the posts from MakeUseOf. I hope this has helped people who haven’t joined Friendfeed yet and needed some questions answered first before taking the leap. If you have any other Friendfeed questions not covered here, please leave them in the comments. Image Credit : adKinn Did you like the post? Please do share your thoughts in the comments section! New on Twitter ? Now you can follow MakeUseOf on Twitter too. Related posts
| ||
| Clean up your PC with Windows Installer Clean Up Utility Posted: 24 Jul 2009 07:01 AM PDT
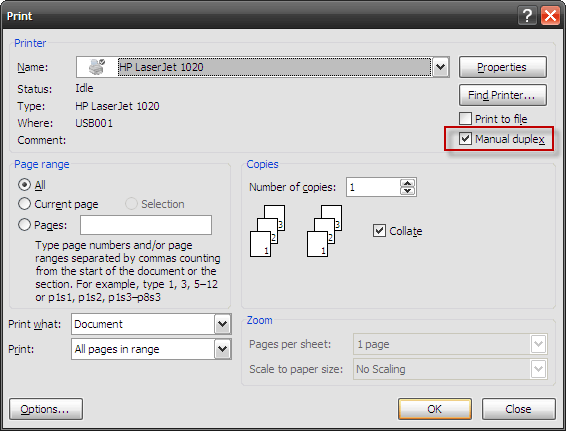
Maybe you have seen unknown errors during installs or just crap lying around from previous uninstalls? Maybe an installation did not complete and now you can not uninstall or re-install it? How do you deal with these situations? Well Microsoft has released a tool aimed at making your life easier. This 351KB file will help you clean out all of these problems. You do have to install the application. After the usual next, next, next, finish you will be ready to use the tool. When you run it for the first time you will see this:
You can browse through the list of what Windows thinks is installed. Most of the entries looked correct to me. Then I spotted one:
Twingly Screensaver which I installed a while back and shortly thereafter un-installed was still hanging out with my legit programs. This seems like a good test and I selected the item and hit Remove. I quickly got a warning message popping up on my screen:
I was sure of what I was doing so I hit OK. A DOS box popped up and disappeared quickly but I managed to grab a screen shot of some of the commands scrolling by as you can see here:
It runs through the registry using command line options to search and remove registry items associated with your application and then it grabs and deletes shared dll's and other files. It worked quite nicely. We have featured some other uninstallation / clean up tools in the past. Mac users can see Jeffry’s post here and we also have a couple of other Windows alternatives, one from Jimmy and another from Stefan. Do you have a favorite all in one clean up utility that does the dirty work for you? If you do please let us know in the comments! Did you like the post? Please do share your thoughts in the comments section! New on Twitter ? Now you can follow MakeUseOf on Twitter too. Related posts
|

 There are almost countless ways to create a blog these days.


 So long as you are logged in,
 If you're the kind of person who tracks interestingness in


 I read somewhere that Carl Linnaeus, the Swedish naturalist, was the guy who invented index cards three centuries ago. That way he could pigeonhole vast amounts of data during his studies.


 There have been a lot of musical masterpieces in the world of gaming. No, Portal wasn’t the only one.
 In
In 


 As well as the common selling sites such as
  packages out there for installing a checkout system on your site but the two easiest and cheapest are
  When it comes to selling your books, you need to be able to show some good quality book covers. If you were the customer, would you buy a book with a bad quality picture of the cover? (or even worse, no cover at all?). Exactly. So you need to make a big effort to show your books in the best possible light. It’s the picture that really will close the deal for you.

 Interact as much as you can because this really is one of the best aspects of Friendfeed and makes you appear on other people’s feeds. Sharing an item with people on
  The search feature is really useful but requires some getting used to. It has also replaced some features that had their own buttons so there really are many things you can do with it. For instance in the top search bar while on a page, type the beginning of a friend’s name to go to their feed.
 Have you ever tried to install a program only to get an error message that another installation or un-installation is pending?


| You are subscribed to email updates from MakeUseOf.com To stop receiving these emails, you may unsubscribe now. | Email delivery powered by Google |
| Google Inc., 20 West Kinzie, Chicago IL USA 60610 | |
No comments:
Post a Comment